You have only a few seconds to win a buyer’s attention online, and in Manhattan’s luxury market those seconds are everything. If your photos do not tell a clear, aspirational story, qualified buyers will simply move on. You want a launch that sparks showings and strong offers, not a slow drip of interest. This guide shows how design-led staging transforms that outcome with data, practical tactics, and Manhattan-specific steps you can act on today. Let’s dive in.
Why design-led staging matters in Manhattan
Manhattan is a high-expectation, image-driven market. Recent market reporting shows a Q4 2025 median sale price near $1,125,000 and an average marketing time of roughly 74 days. Luxury inventory tightened, and cash buyers remain active at the top of the market. That mix means presentation quality has a direct impact on how many serious buyers choose to tour your home. Market context from the Elliman Report supports this strategy lens.
In a market where most buyers begin online, your listing needs to look editorial, not just clean. A design-forward staging plan paired with professional photography increases qualified traffic during the first marketing window when attention is strongest. The goal is simple: more showings from the right buyers, sooner.
What the data says about results
Staging improves outcomes
Industry datasets consistently show positive effects from staging. In aggregated 2025 samples, the Real Estate Staging Association reports staged properties often sell above list and spend fewer days on market. Some quarterly samplings show sale-to-list around 109 percent, which is roughly 9 percent over list in those samples. Treat these figures as directional benchmarks. They are strong signals, not guarantees. You can review the RESA staging statistics for context.
Agent survey data aligns with that picture. The National Association of REALTORS reports that a significant share of agents see offers 1 to 10 percent higher for staged homes. Buyer agents also say staging helps buyers visualize a property as a home, with living rooms, primary bedrooms, and kitchens ranking as the most influential spaces. See the NAR summary on staging impact.
Photos and staging work together
Professional photography does more than document a space. In national marketplace analyses, listings with professional photos tend to get more views, sell faster, and can command higher prices. For Manhattan, where design is part of the product, staging plus photography is a conversion engine. Staging optimizes scenes for the camera and photos amplify the staging. Explore Redfin’s findings on professional photos.
Virtual staging: speed, value, and disclosure
Virtual staging can be an efficient way to show furniture scale or alternative uses for a room. It can also boost online engagement when time or budget is tight. In New York, you must disclose any digitally altered images to keep advertising truthful. Best practice is to label virtually staged images clearly and, when possible, pair them with at least one unaltered image of the same view. Read NAR’s guidance on avoiding misleading edits and industry best practices in this article on virtual image risks. For New York’s rulemaking on truthful advertising, see the NY Department of State register entry.
Design-led principles that sell
Stage for your target buyer
Every design choice should serve the likely buyer. If you expect a pied-a-terre buyer or an international investor, you want a refined, low-clutter aesthetic with tailored scale. Families may appreciate defined zones and flexible spaces. The throughline is neutral, current, and buyer-centric. NAR’s staging research reinforces how alignment with buyer tastes influences perceived value.
Show scale and circulation
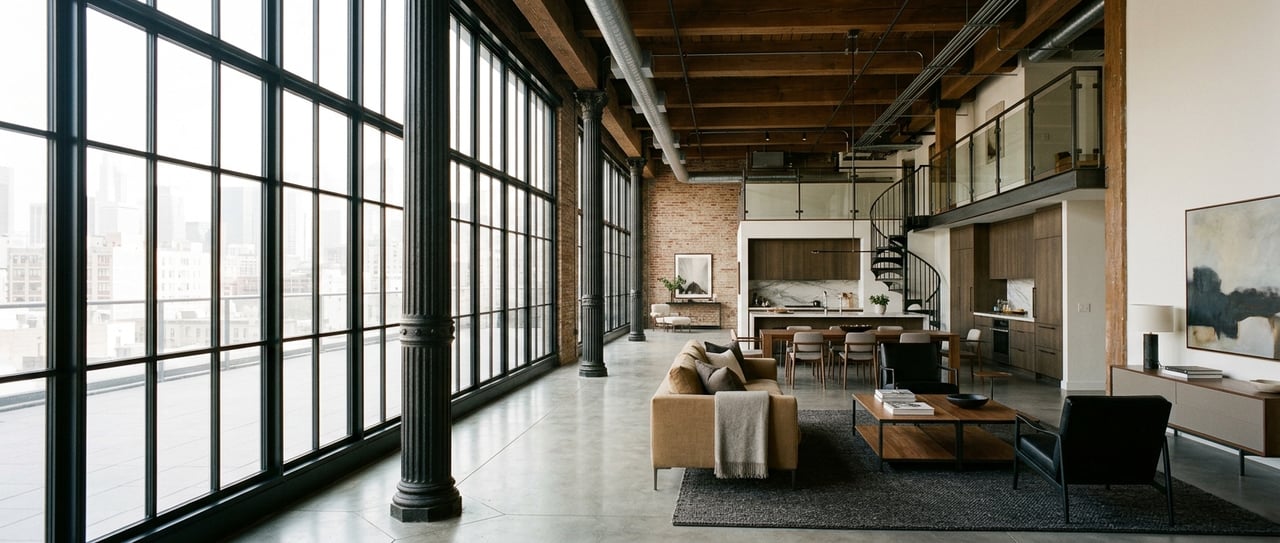
Manhattan rooms can be compact or irregular. Use appropriately scaled seating, rugs that frame zones, and open sightlines that make circulation obvious. The goal is to show how the room functions without crowding.
Prioritize light and views
Buyers in Manhattan often value natural light and outlook. Style window frames to highlight exposure, skyline or park glimpses. Keep window treatments light and neutral so photos read bright and spacious.
Create an attainable luxury vignette
Build an editorial feel that is aspirational yet believable. Think layered textiles, simple sculptural lighting, period-appropriate art for prewar settings, and one or two accent tones against a calm base. You are selling a lifestyle that is ready on day one.
Design with the camera in mind
Plan key camera angles in advance. Anchor each hero room with a strong primary viewpoint, plus a mix of wide and detail frames. Daylight and twilight images both matter in Manhattan. Pair design with a photographer who regularly shoots interiors, and remember that staging and photography are complementary. See why pro photography changes results.
Room-by-room priorities in Manhattan
- Living room or great room: Highest priority. Define seating and circulation, emphasize the best view or architectural detail, and use art and lamps to add warmth. NAR data places the living room at the top of buyer influence.
- Primary bedroom: Second priority. Aim for a calm, hotel-like suite with neutral bedding and proper bedside lighting. Keep surfaces styled but not busy.
- Kitchen and dining: Third priority. Even compact kitchens benefit from a simple dining vignette or island seating to signal how you entertain.
- Secondary bedrooms and office: If budget is limited, consider virtual staging here. Keep hero rooms physically staged.
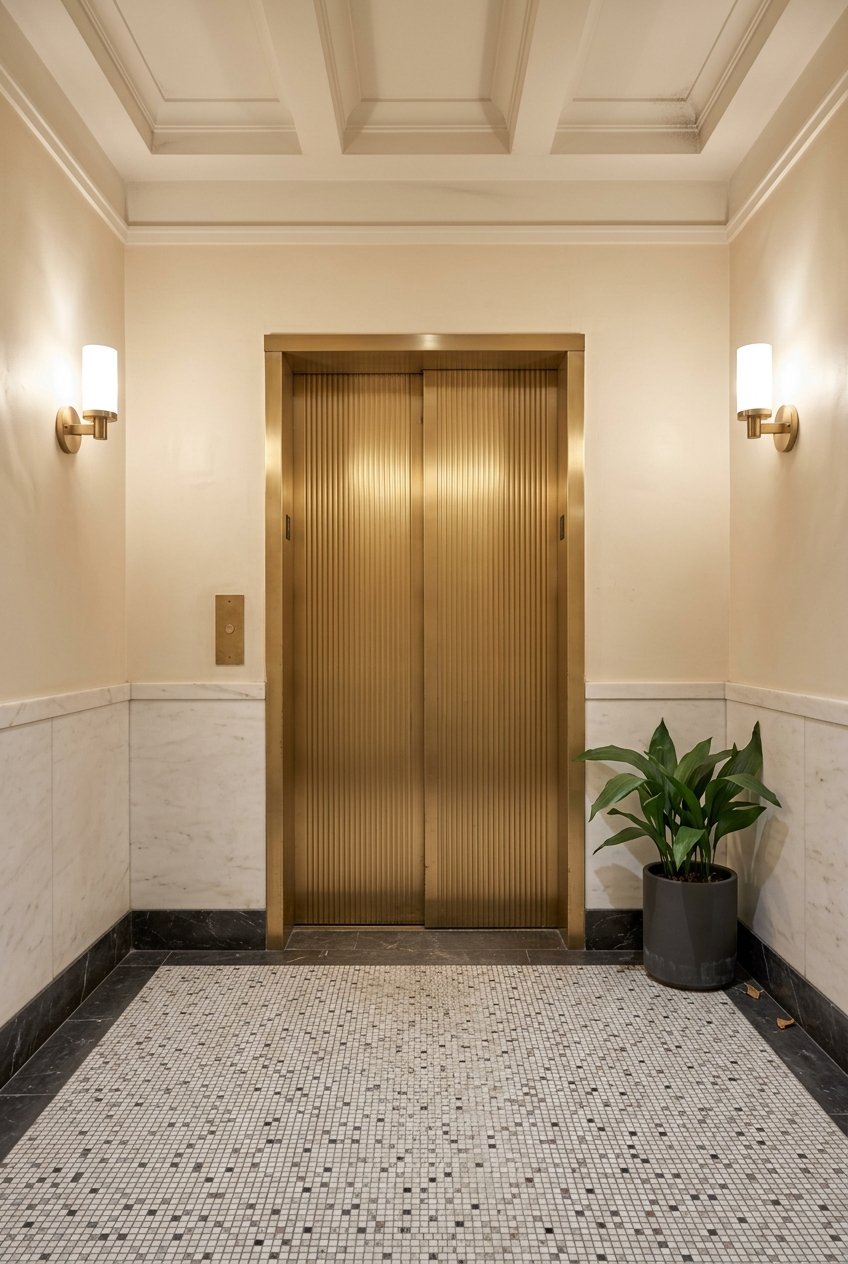
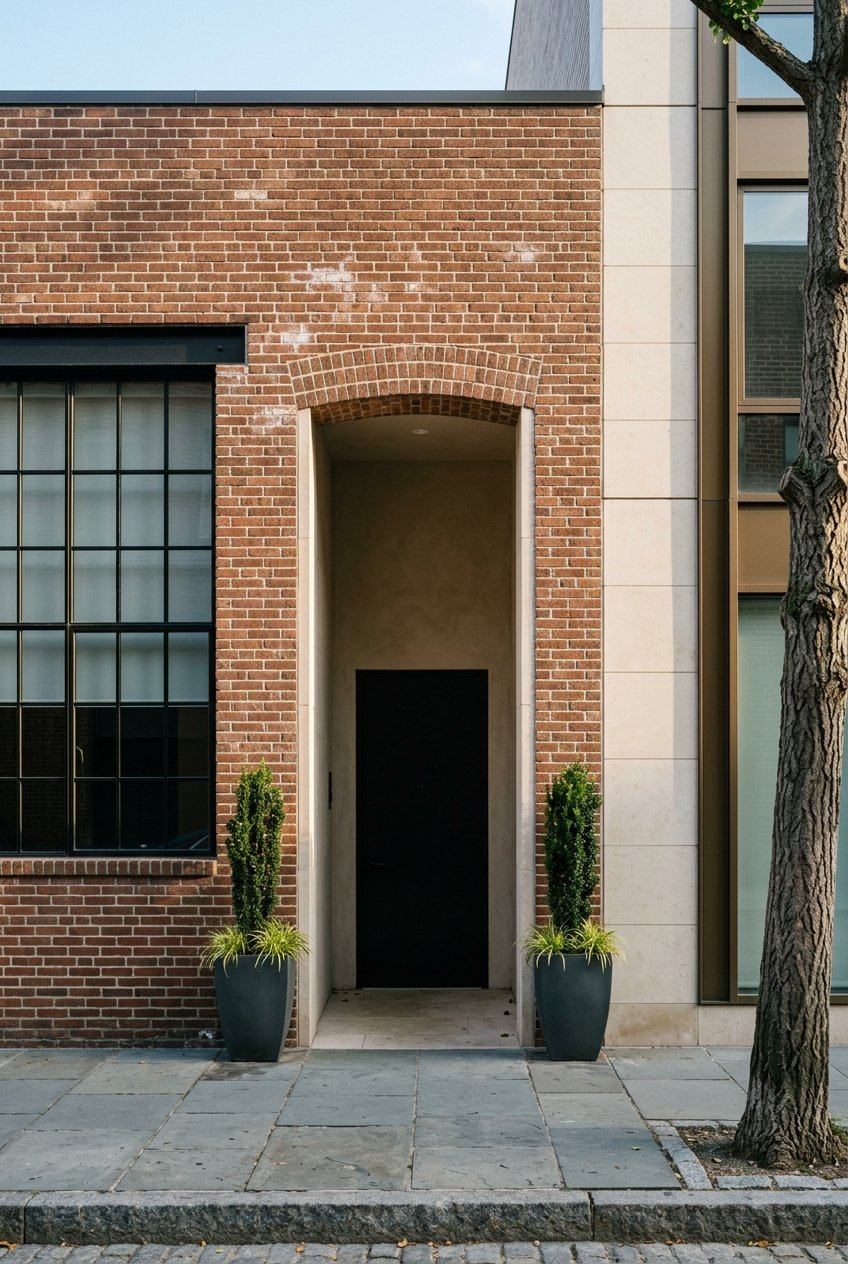
- Townhouse entries and outdoor space: In Manhattan townhouses, a welcoming parlor and a styled terrace or garden can expand perceived living area.
Staging strategies and budgets
Full concierge design staging
Best for listings at or above the luxury threshold. A designer-curated package with high-quality inventory, art, textiles, and professional installation creates the strongest editorial read. Physically stage the living room and primary bedroom as non-negotiable. Consider additional rooms as needed to complete the story.
Hybrid approach
Physically stage the hero rooms. Virtually stage secondary or flexible spaces to show options, such as a home office or guest suite. Always label digital edits and keep an original photo available for transparency. NAR’s guidance on disclosure is a useful reference in this area. See the NAR commentary on virtual edits.
Photo-first quick relaunch
If timing is urgent, invest in a fast design consultation, a deep declutter, and 1 to 2 rented anchor pieces for the living room. Then schedule professional photography within 24 to 48 hours. This approach maximizes near-term online impact while you refine the broader plan. Review Redfin’s analysis on photography impact.
Costs and ROI benchmarks
- Physical staging: National guides often place modest projects in the low-thousands. A practical planning baseline is about $1,500 to $5,000 for a smaller package. Luxury, multi-room Manhattan installs will price higher due to quality, building logistics, and rental duration. See Redfin’s staging cost guidance.
- Virtual staging: Expect roughly $25 to $150 or more per image depending on customization and retouch level, with premium pricing for high-end deliverables. Local vendor overviews outline typical New York tiers. Review this NYC-focused virtual staging guide.
- ROI ranges: Aggregated datasets from RESA and agent surveys often show reduced days on market and offer uplifts of 1 to 10 percent. Some RESA samples even show above-list results. Treat these as benchmarks rather than promises. Explore RESA’s statistics and the NAR staging profile.
Vendor selection and Manhattan logistics
A strong staging partner must be as operationally sharp as they are creative. Use this checklist:
- Portfolio that shows Manhattan property types: prewar co-ops, new developments, and townhouses.
- Building experience: certificate of insurance, elevator and move rules, familiarity with co-op board procedures.
- Inventory quality: scale, finishes, and art that fit your architecture and price point.
- Photography workflow: day and twilight sessions, 3D tour or floor plan, and a shot list planned with your agent.
- Transparent pricing terms: design consult fee, monthly rental, delivery and removal, insurance coverage, and access timing.
- Clear disclosure process for any virtual images and retention of original files.
Co-ops often require elevator reservations and insurance documentation. Townhouses may need to coordinate curb access for installation and photography. Allow lead time for approvals so your launch stays on schedule.
Implementation timeline and launch plan
- Day 1 to 3: Pre-list design consult to define target buyer, scope, and budget.
- Day 4 to 7: Decide physical vs hybrid vs virtual approach. Confirm vendor availability and building access.
- Day 8 to 11: Installation and styling. Buffer for elevator windows and delivery coordination.
- Day 12 to 13: Professional photography, including a twilight exterior and any 3D or floor plan assets.
- Launch: Go live with a light-filled hero image, 12 to 20 interior shots, a floor plan, and clear labels for any virtually staged scenes. Align with NAR’s disclosure guidance.
Before-and-after scenarios
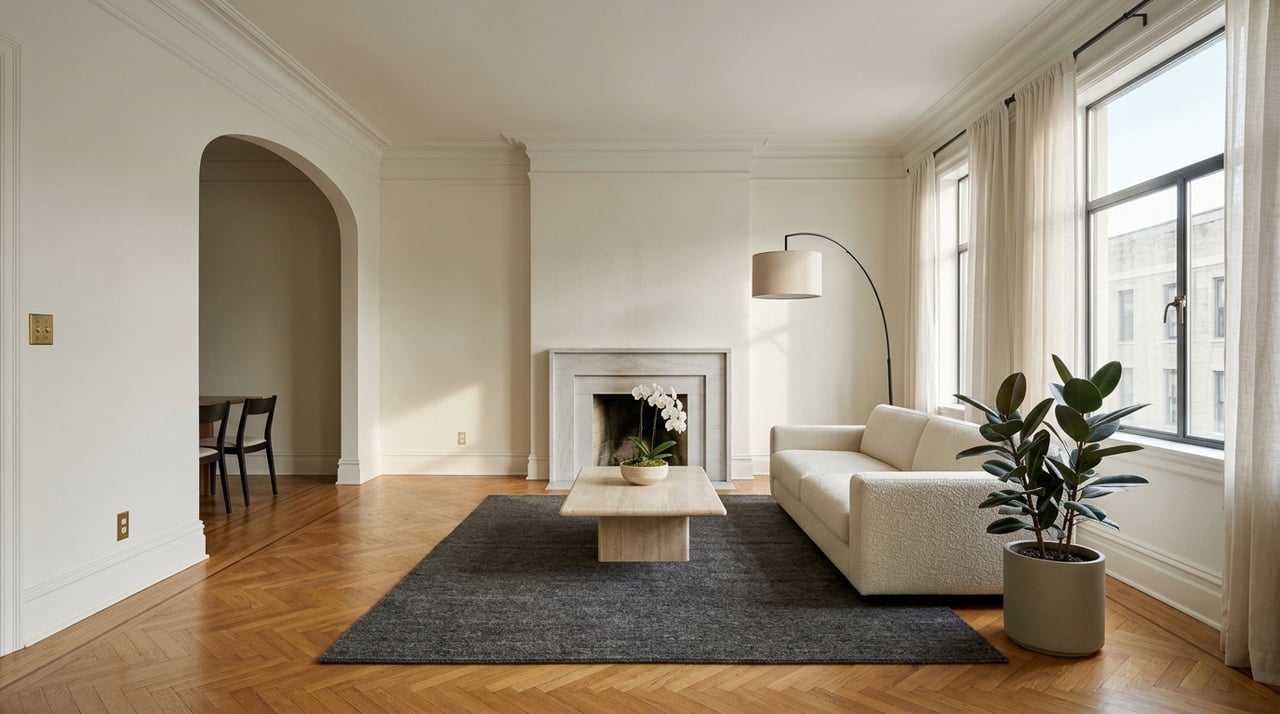
- Compact one-bedroom condo: Before, the room felt busy and undersized. After, a scaled loveseat, single chair, and a right-sized rug defined circulation and made the window the star. Expect stronger click-throughs and more showing requests in week one based on industry staging samples. Review RESA’s data for context.
- Upper East Side prewar co-op: Before, dated lighting and personal art distracted from mouldings. After, period-appropriate pieces, soft lamps, and curated art reframed the architecture. Buyer agents say living rooms and primary bedrooms carry the most influence, which supports this focus. See the NAR staging profile.
- Townhouse with garden: Before, an empty garden level and bare terrace felt ambiguous. After, a staged parlor and outdoor dining set expanded perceived living area. A twilight hero image added drama and helped market weekend events. Industry samples show this can broaden the buyer pool. Reference RESA’s statistics.
How to measure success
Track weekly key metrics and compare to local comps. Useful indicators include online views and saves, showing requests per week, days on market, offers received, and sale-to-list ratio. The short-term aim is a surge of showings in the first 7 to 14 days, since early momentum often correlates with stronger offers. Industry surveys and staging datasets point to reduced time on market and 1 to 10 percent uplifts in offers when staging is done well. For Manhattan, that momentum is the edge you want.
Ready to map a design-led launch for your Manhattan home? Partner with a boutique advisor who blends aesthetic direction with disciplined marketing and Sotheby’s reach. Connect with Sangeeta Gupta for a tailored staging and sale plan.
FAQs
What is design-led staging and how is it different from basic decluttering?
- Design-led staging curates furniture, art, lighting, and styling to match the likely buyer and the camera, which research links to higher perceived value and faster sales compared to simple tidying.
How much should I budget to stage a Manhattan luxury listing?
- Plan a baseline of about $1,500 to $5,000 for modest physical staging, with higher budgets for multi-room luxury packages; virtual staging typically runs about $25 to $150+ per image depending on customization.
Is virtual staging allowed in New York City listings, and how should it be disclosed?
- Yes, it is widely used, but New York requires truthful advertising, so clearly label any digitally altered images and keep an original, unedited photo available for transparency.
Which rooms deliver the best return from staging in Manhattan homes?
- Focus on the living room first, then the primary bedroom and the kitchen or dining area, since buyer-agent surveys consistently rank these spaces as most influential.
How long does the staging process take from consult to listing launch?
- A typical timeline is about two weeks: a few days for consult and planning, several days for installation, then photography within 24 to 48 hours before going live with a complete visual package.